REST 방식으로 JPA Data에 접근하기
우리는 관계형 JPA data에 접근하는 Application을 만들려고 합니다!
hypermedia-based RESTful front end를 통해서 말이죠!
우리가 만들 것
우리가 만들 것은 Spring Data REST 방식을 통해 Person 객체를 만들고 값을 저장하는 Spring application입니다.
Spring Data REST는 Spring HATEOAS 와 Spring Data JPA 를 자동적으로 묶어줍니다.
Spring HATEOAS 개념 (아래 링크 참조)
https://engkimbs.tistory.com/866
[Spring REST API #9] 스프링 HATEOAS 개념 및 적용
| 스프링 HATEOAS HATEOAS는 Hypermedia As The Engine Of Application State 의 쟉자로 REST 아키텍처의 한 구성요소입니다. 이 HATEOAS를 통해서 어플리케이션의 상태를 전이할 수 있는 메커니즘을 제공할 수 있..
engkimbs.tistory.com
필요한 것
- 약 15분의 시간
- 자주 사용하는 IDE
- JDK 1.8 이상의 버전
- gradle 4+ or maven3.2+
Spring Initializr로 프로젝트를 생성
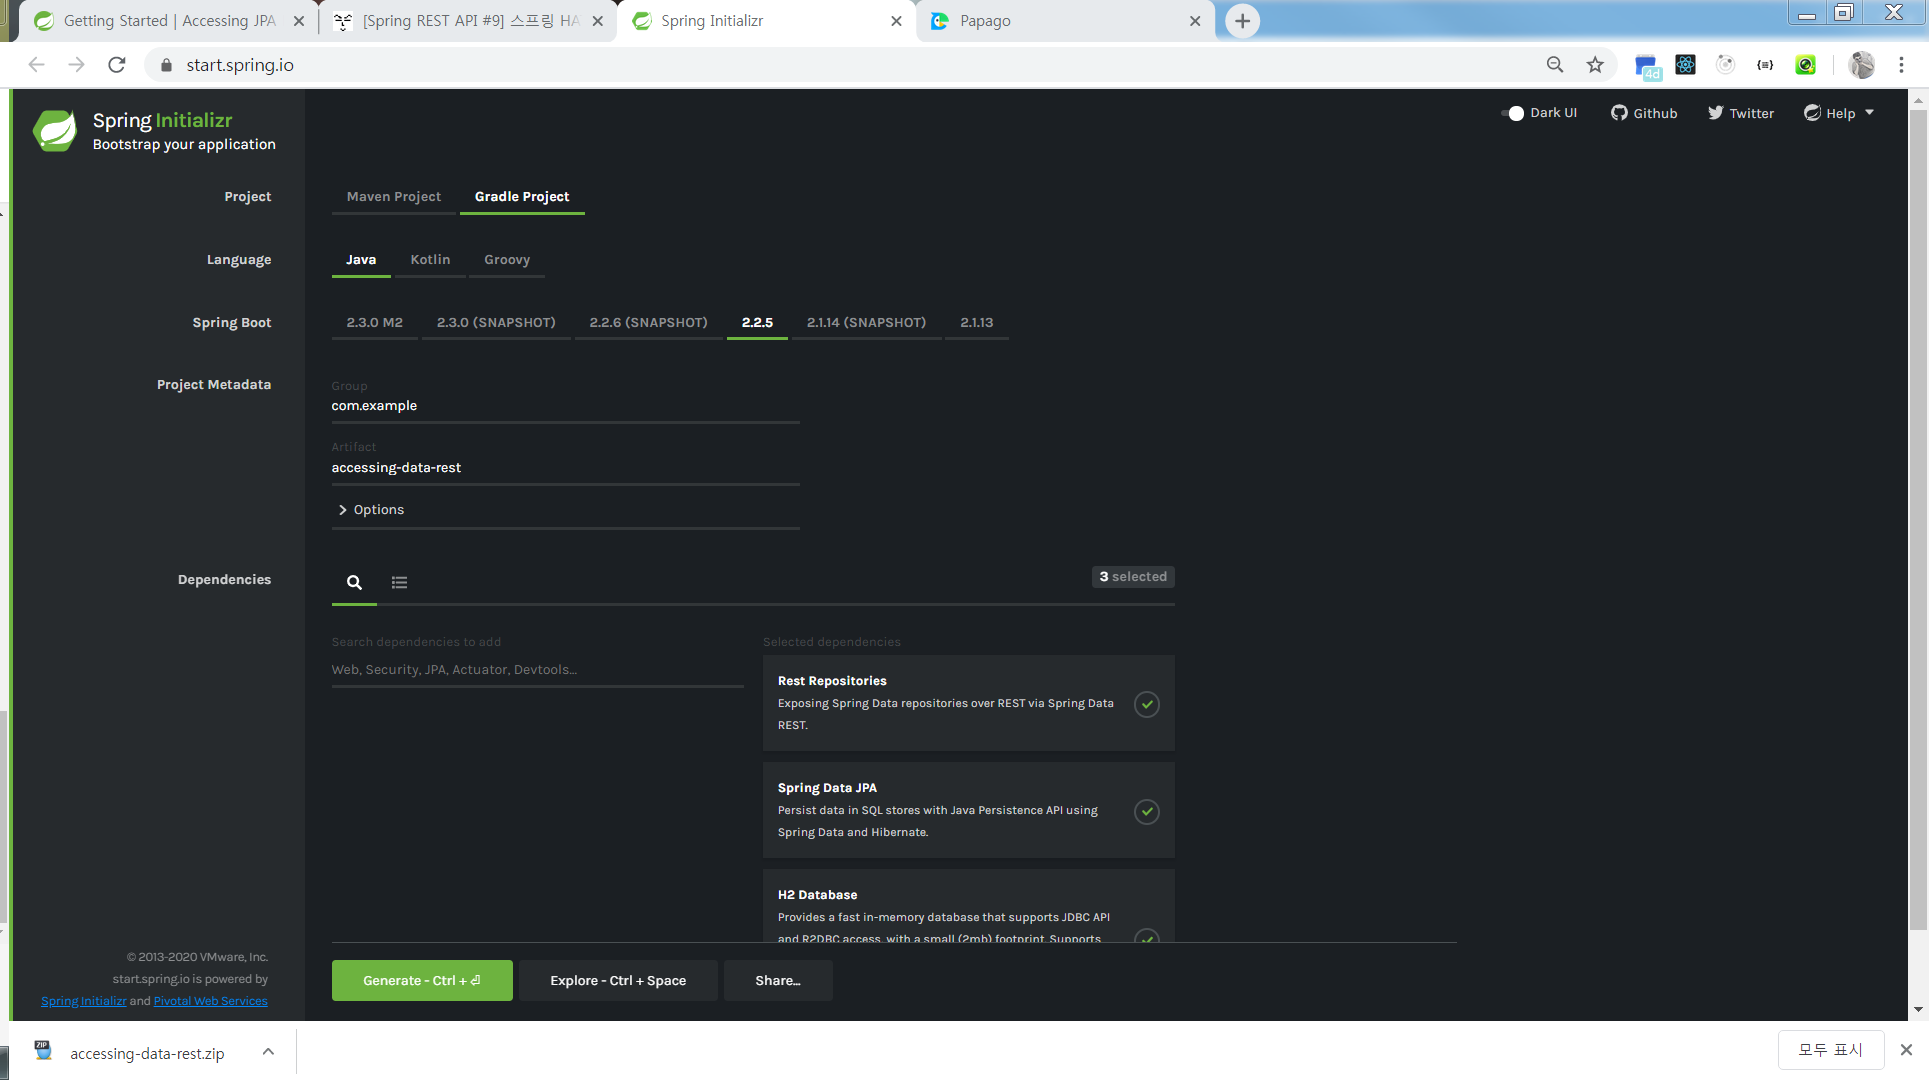
Rest Repositories, Spring Data JPA, H2 Database 세 가지의 의존성을 추가해 줍니다.
압축을 푸시고 터미널, 폴더, 애디터에서 열기 등 원하는 방식으로 프로젝트를 열어주세요.
프로젝트의 빌드 방식에 따라 세 가지 의존성이 잘 추가 되었는지 확인해 주세요.
plugins {
	id 'org.springframework.boot' version '2.2.2.RELEASE'
	id 'io.spring.dependency-management' version '1.0.8.RELEASE'
	id 'java'
}

group = 'com.example'
version = '0.0.1-SNAPSHOT'
sourceCompatibility = '1.8'

repositories {
	mavenCentral()
}

dependencies {
	implementation 'org.springframework.boot:spring-boot-starter-data-jpa'
	implementation 'org.springframework.boot:spring-boot-starter-data-rest'
	runtimeOnly 'com.h2database:h2'
	testImplementation('org.springframework.boot:spring-boot-starter-test') {
		exclude group: 'org.junit.vintage', module: 'junit-vintage-engine'
	}
}

test {
	useJUnitPlatform()
}
<?xml version="1.0" encoding="UTF-8"?>
<project xmlns="http://maven.apache.org/POM/4.0.0" xmlns:xsi="http://www.w3.org/2001/XMLSchema-instance"
xsi:schemaLocation="http://maven.apache.org/POM/4.0.0 https://maven.apache.org/xsd/maven-4.0.0.xsd">
<modelVersion>4.0.0</modelVersion>
<parent>
<groupId>org.springframework.boot</groupId>
<artifactId>spring-boot-starter-parent</artifactId>
<version>2.2.2.RELEASE</version>
<relativePath/> <!-- lookup parent from repository -->
</parent>
<groupId>com.example</groupId>
<artifactId>accessing-data-rest</artifactId>
<version>0.0.1-SNAPSHOT</version>
<name>accessing-data-rest</name>
<description>Demo project for Spring Boot</description>
<properties>
<java.version>1.8</java.version>
</properties>
<dependencies>
<dependency>
<groupId>org.springframework.boot</groupId>
<artifactId>spring-boot-starter-data-jpa</artifactId>
</dependency>
<dependency>
<groupId>org.springframework.boot</groupId>
<artifactId>spring-boot-starter-data-rest</artifactId>
</dependency>
<dependency>
<groupId>com.h2database</groupId>
<artifactId>h2</artifactId>
<scope>runtime</scope>
</dependency>
<dependency>
<groupId>org.springframework.boot</groupId>
<artifactId>spring-boot-starter-test</artifactId>
<scope>test</scope>
<exclusions>
<exclusion>
<groupId>org.junit.vintage</groupId>
<artifactId>junit-vintage-engine</artifactId>
</exclusion>
</exclusions>
</dependency>
</dependencies>
<build>
<plugins>
<plugin>
<groupId>org.springframework.boot</groupId>
<artifactId>spring-boot-maven-plugin</artifactId>
</plugin>
</plugins>
</build>
</project>위에서 부터 차례대로 gradle 설정, maven 설정 입니다.
도메인 객체 생성하기
도메인 객체를 생성합니다. Person 으로 이름을 설정해 주시고 id는 자동생성되고 맵핑될 수 있게 어노테이션을 달아 주시면 됩니다.
package com.example.accessingdatarest;

import javax.persistence.Entity;
import javax.persistence.GeneratedValue;
import javax.persistence.GenerationType;
import javax.persistence.Id;

@Entity
public class Person {

  @Id
  @GeneratedValue(strategy = GenerationType.AUTO)
  private long id;

  private String firstName;
  private String lastName;

  public String getFirstName() {
    return firstName;
  }

  public void setFirstName(String firstName) {
    this.firstName = firstName;
  }

  public String getLastName() {
    return lastName;
  }

  public void setLastName(String lastName) {
    this.lastName = lastName;
  }
}
Person 객체는 firstName 과 lastName을 가지고 있습니다. id는 jpa가 자동으로 생성하기 때문에 코드를 작성할 필요가 없습니다.
Person Repository는 인터페이스이며 사용자 개체를 포함한 다양한 작업을 수행할 수 있습니다. Spring Data Commons에 정의된 PagingAndSortingRepository 인터페이스를 확장하여 이러한 작업을 수행합니다.
작업을 수행하는 동안, Spring Data REST 는 implementation을 이 인터페이스에서 자동적으로 만듭니다.
그리고 이 implementation은 @RepositoryRestResource를 이용하여 /people endpoint를 만들도록 지시합니다.
package com.example.accessingdatarest;

import java.util.List;

import org.springframework.data.repository.PagingAndSortingRepository;
import org.springframework.data.repository.query.Param;
import org.springframework.data.rest.core.annotation.RepositoryRestResource;

@RepositoryRestResource(collectionResourceRel = "people", path = "people")
public interface PersonRepository extends PagingAndSortingRepository<Person, Long> {

  List<Person> findByLastName(@Param("name") String name);

}
또한 LastName에 기반한 사용자 객체 목록을 검색하기 위한 사용자 쿼리를 정의 했습니다.
@SpringBootApplication은 다음 내용을 모두 추가한 편의 주석입니다.
- @Configuration: 클래스를 응용 프로그램 컨텍스트에 대한 Bean 정의 로 태그합니다.
- @EnableAutoConfiguration: 스프링 부트에게 클래스 경로 설정, 다른 Bean 및 다양한 속성 설정에 따라 Bean 추가를 시작하라고 지시합니다. 예를 들어, Spring-webmvx가 classpath에 있는 경우 이 주석에서는 응용 프로그램을 웹 응용 프로그램으로 플래그 지정하고 DispatcherServlet 설정과 같은 주요 동작을 활성화 합니다.
- @ComponentScan: Spring이 com/example 패키지에서 다른 구성요소, 구성 및 서비스를 검색하여 컨트롤러를 찾을 수 있도록 합니다.
main() 메소드는 Spring Boot의 SpringApplication.run() 메소드를 사용하여 애플리케이션을 시작합니다. XML이 한 줄도 없고, web.xml 파일도 없습니다. 이 웹 애플리케이션은 100% 순수 Java이므로 plumbing or infrastructure를 구성할 필요가 없습니다.
스프링 부트는 자동으로 Spring Data JPA를 가동시켜 PersonRepository의 구체적인 구현을 생성하고 JPA를 사용하여 백엔드 인 메모리 데이터베이스와 대화하도록 구성합니다.
Spring Data REST는 Spring MVC 위에 구축됩니다. 스프링 MVC 컨트롤러, JSON 컨버터 및 기타 Bean의 컬렉션을 만들어 RESTful Front End를 제공합니다. 이러한 구성 요소는 Spring Data JPA 백엔드에 연결됩니다. 스프링 부트를 사용하면 이 모든 것이 자동 구성됩니다. 작동 방식을 조사하려면 스프링 데이터 REST의 RepositoryRestMvcConfiguration을 확인합니다.
이제 터미널에서 실행해 보겠습니다.
gradlew bootrun
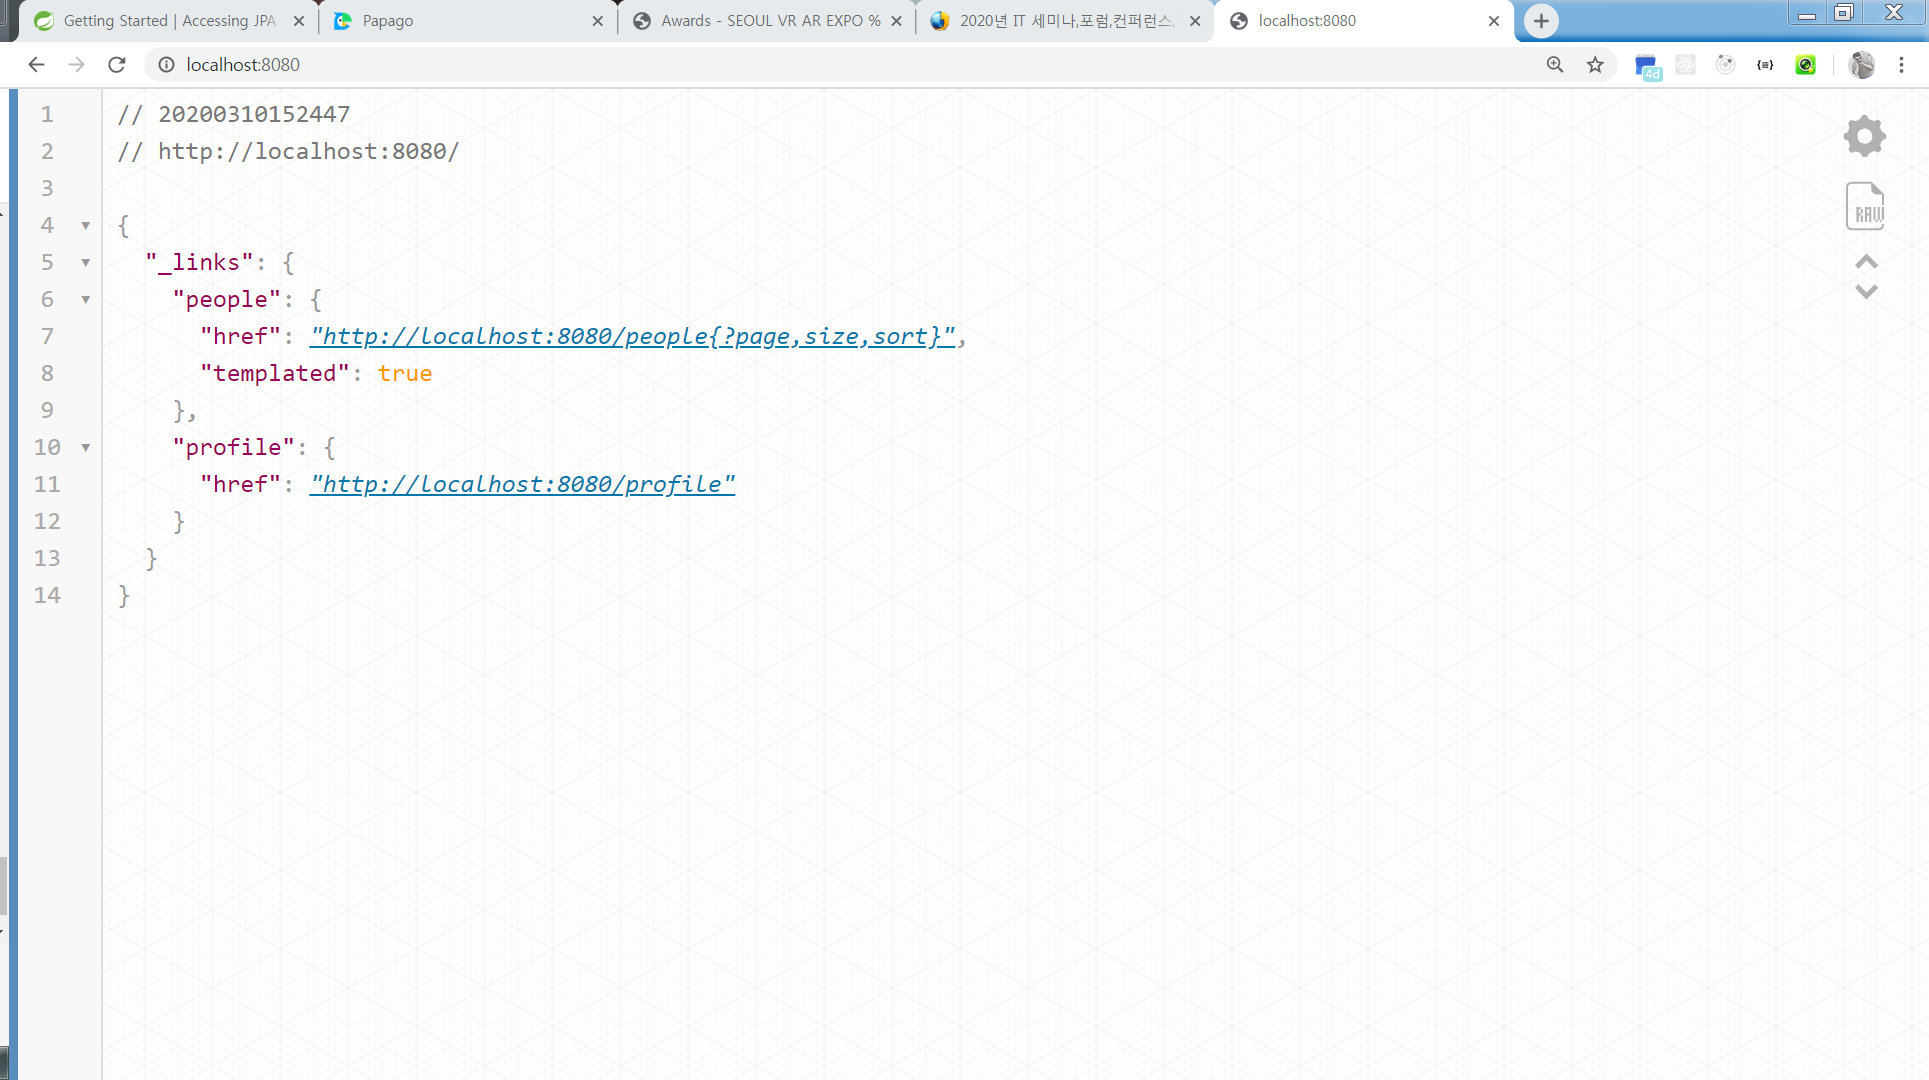
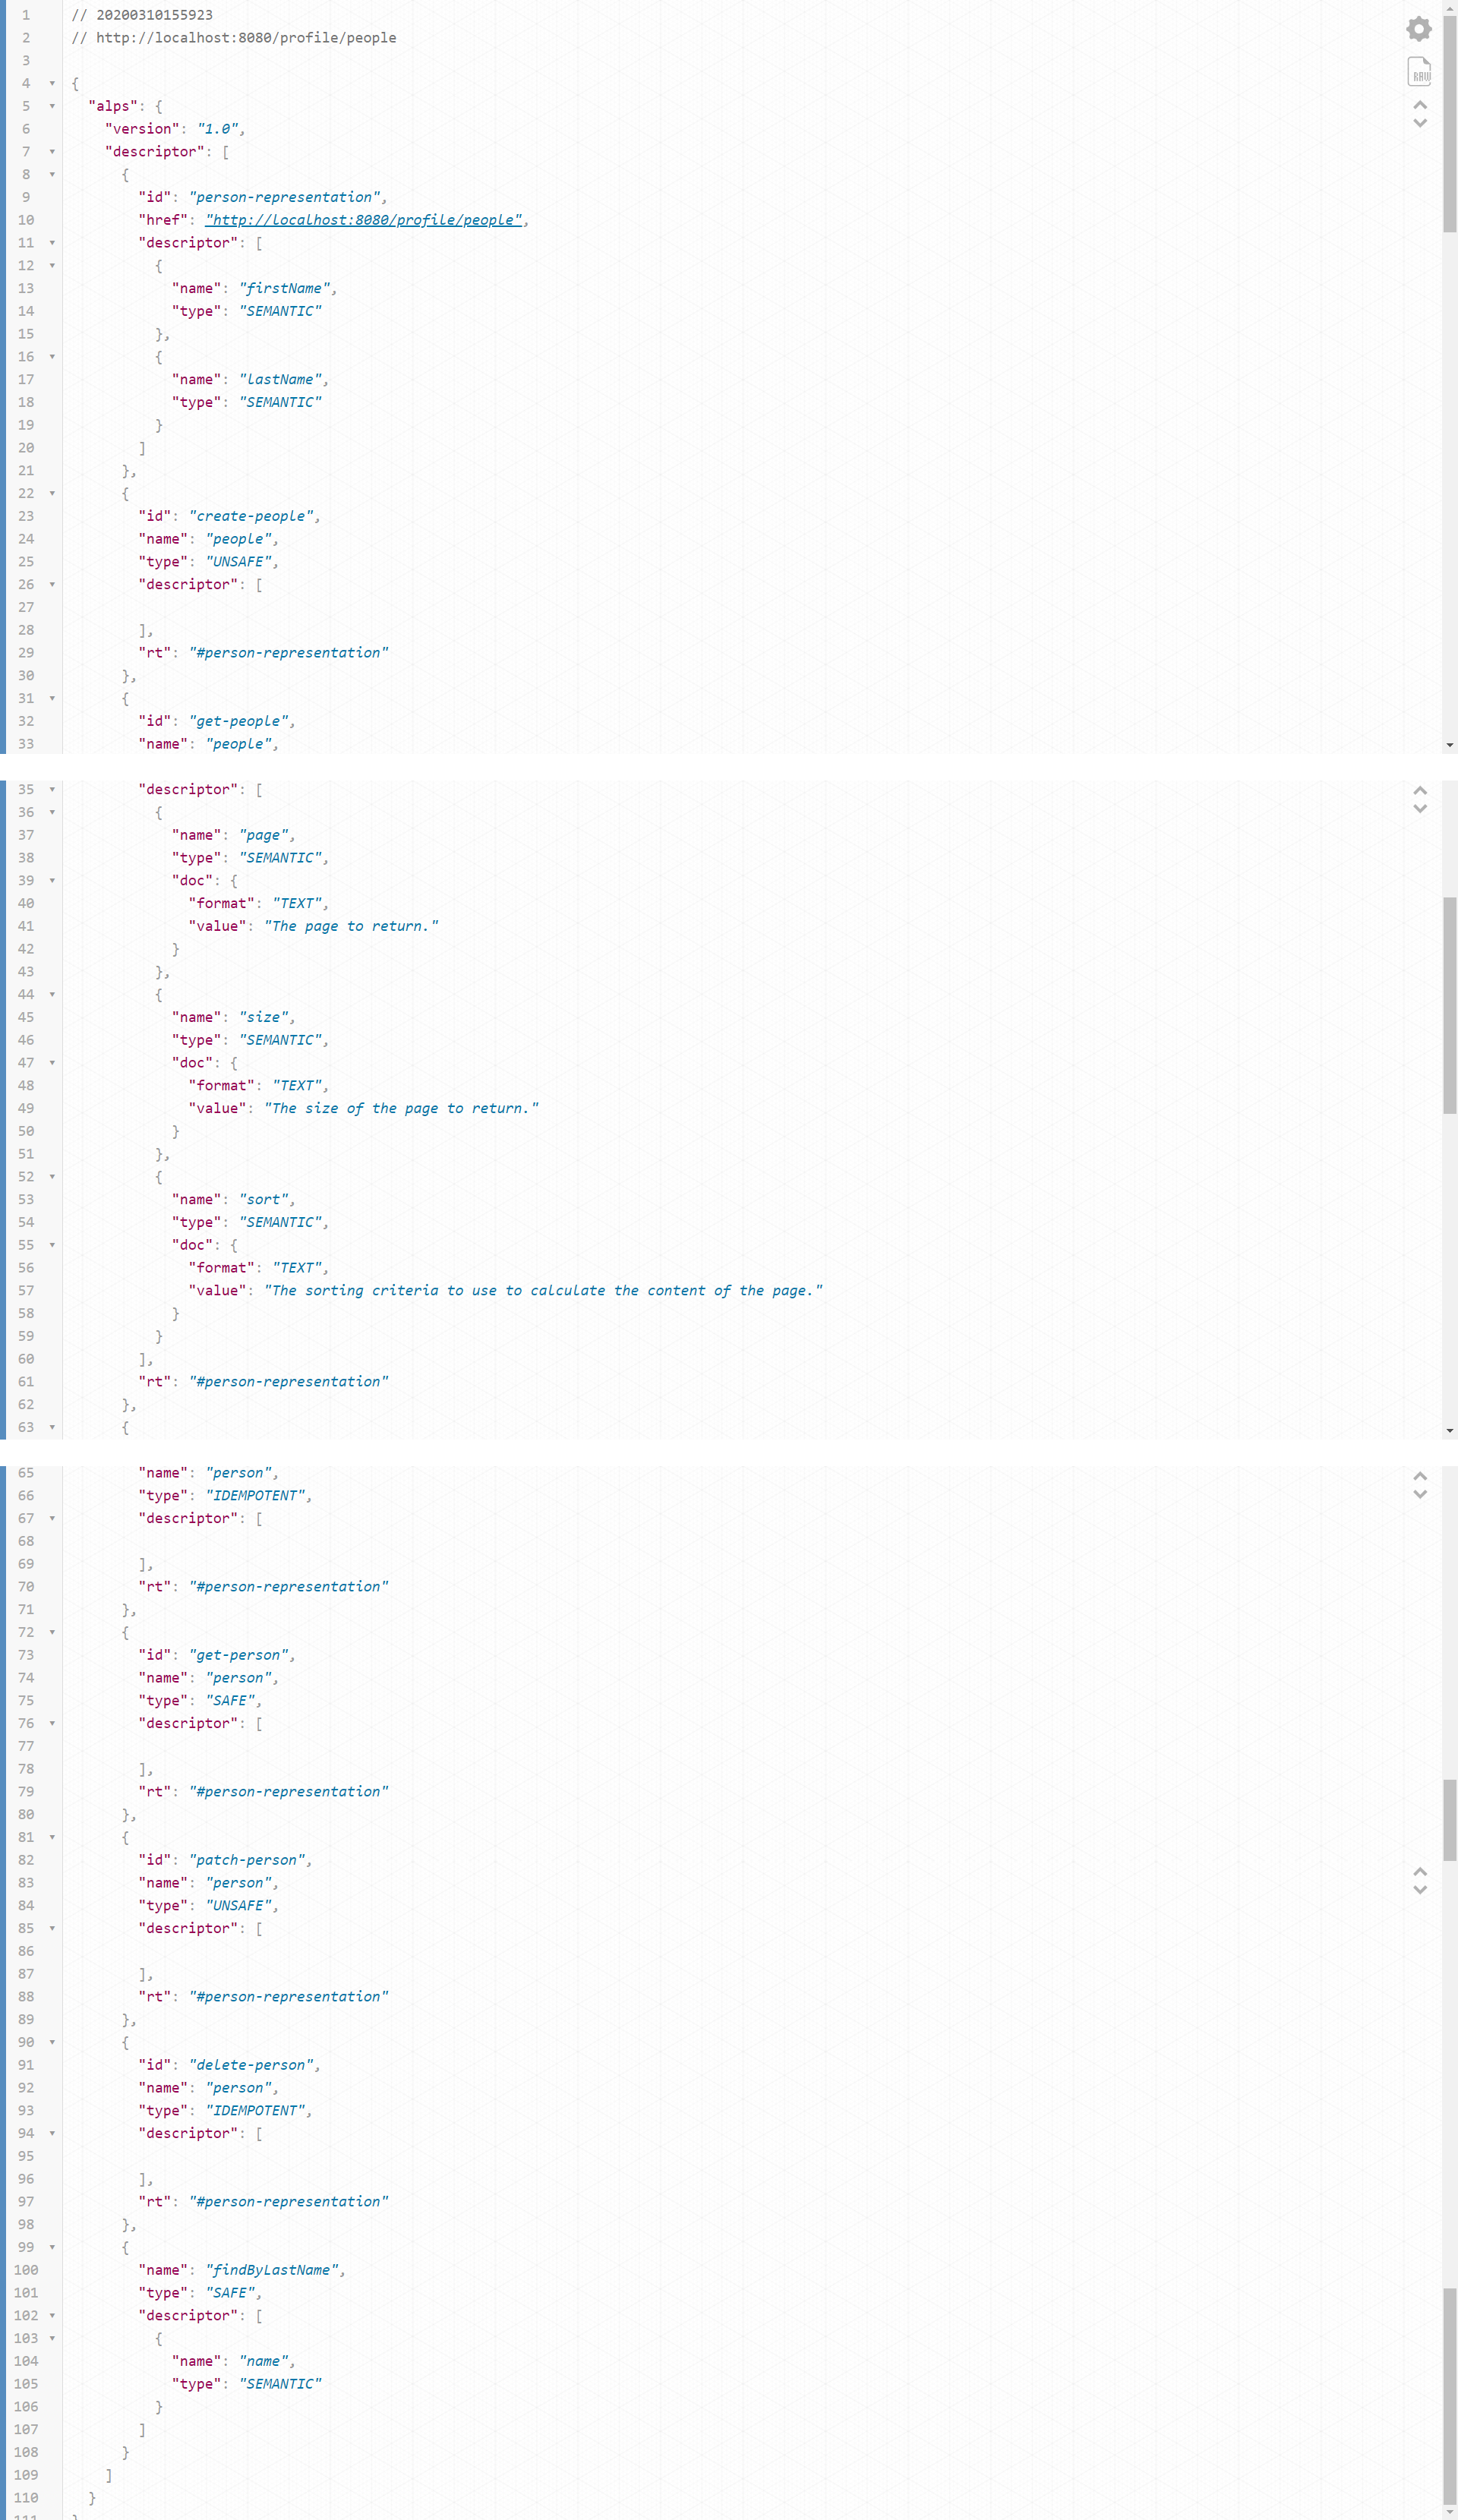
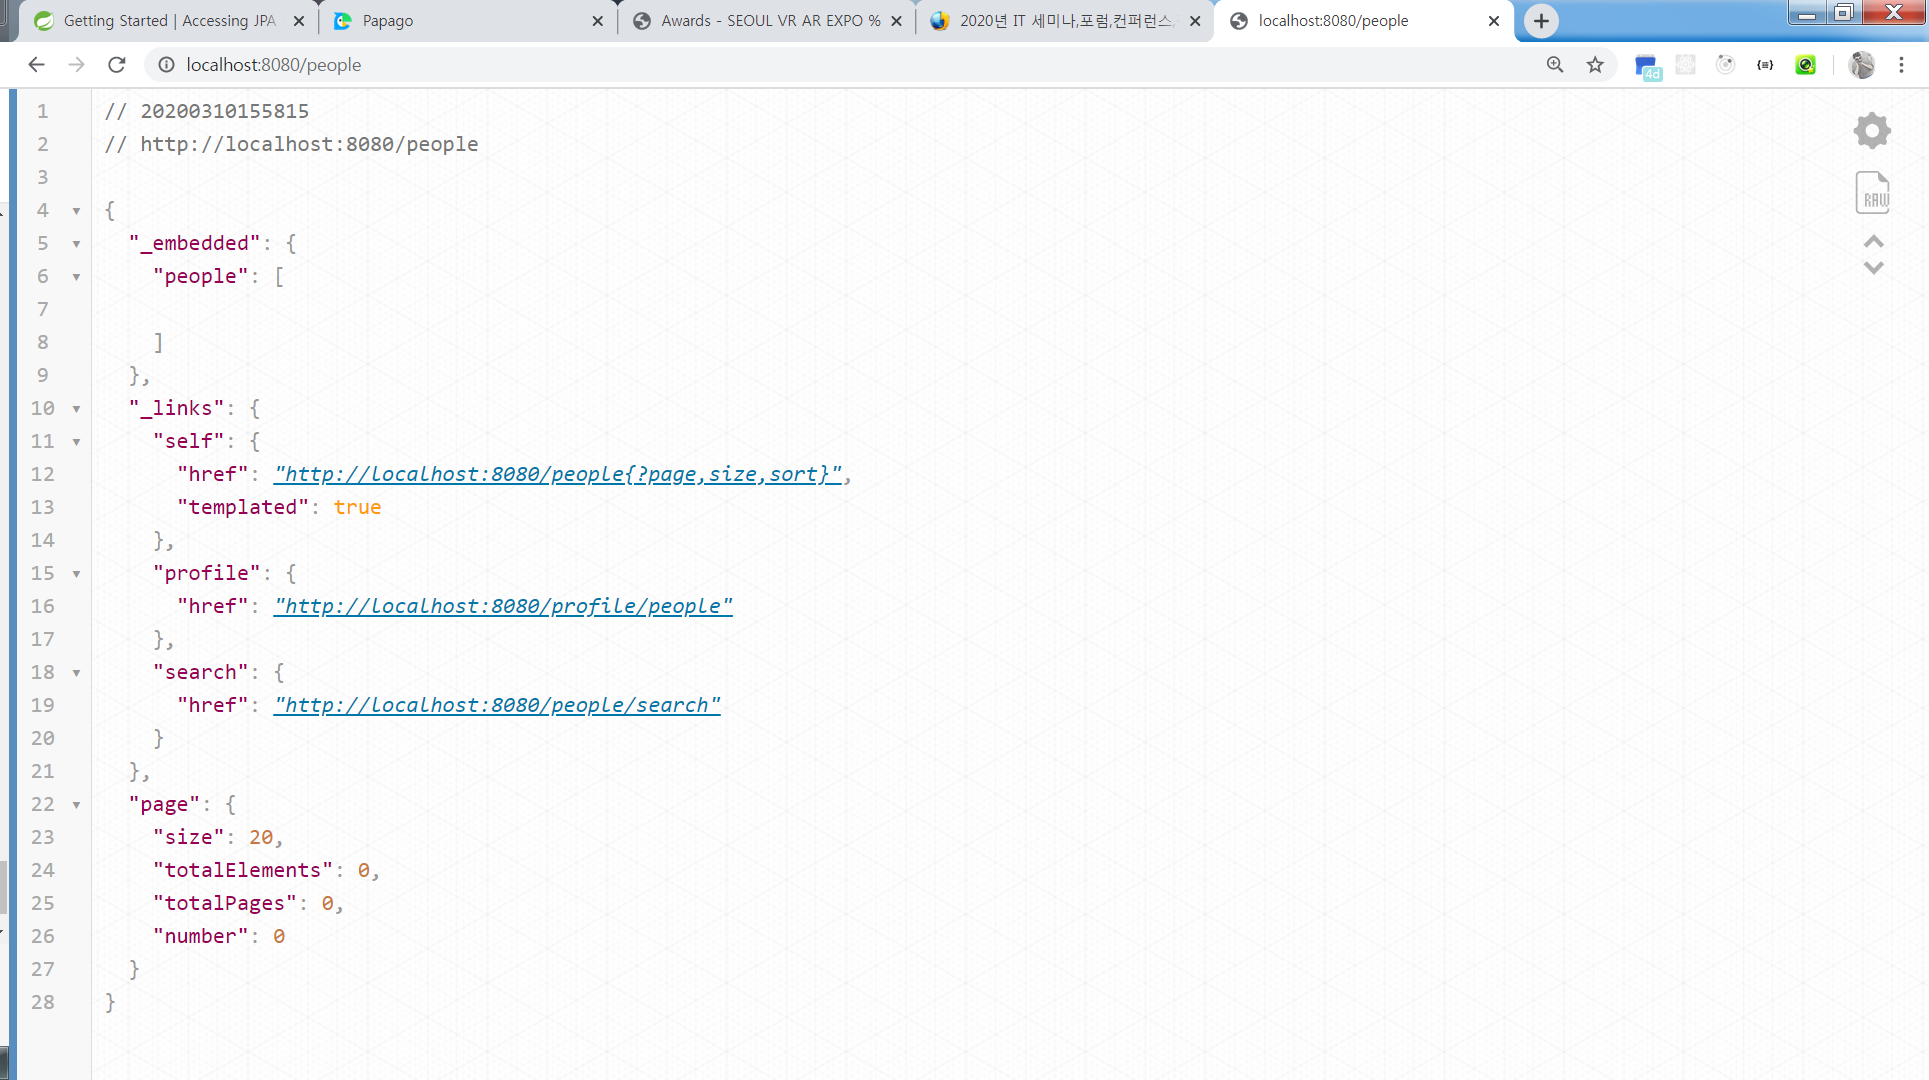
/people 에 대한 요청 결과
/profile/people